
Apollo and JBrowse
Once you have completed jobs in the job queue, you can view the results by clicking on the job name in the Job Queue (details in GenSAS Interface section), or you can view the job results in JBrowse. JBrowse and Apollo (a JBrowse plugin) are integrated into GenSAS and are accessed by clicking on "Browser" in the right hand accoridan menu (Fig. 20A). Once the Browser section of the menu is open, you will see the "Open Apollo" button (Fig. 20B). When that button is clicked, an Apollo tab opens. You can find more detailed information about Apollo and JBrowse through the links on the "Available Tools" table. Please remember that larger genomes take longer to load into JBrowse, please be patient.
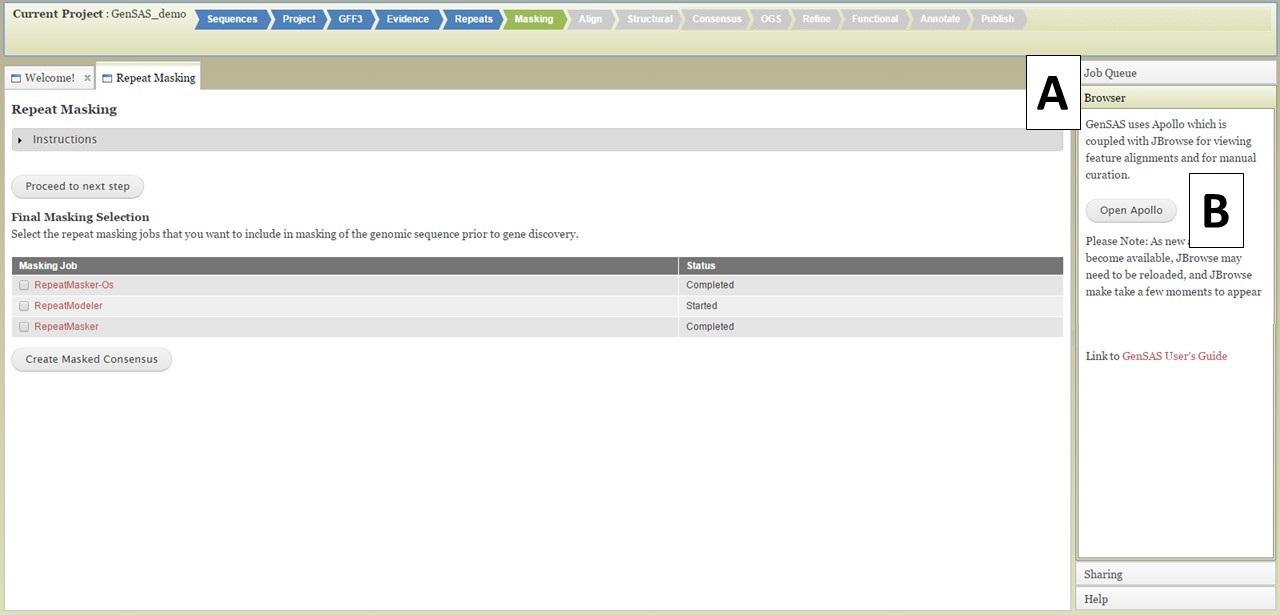
Figure 20. Opening Apollo/JBrowse with Browser section of GenSAS accordian menu.
There are two sections of the Apollo/JBrowse interface with in the Apollo tab. On the left is the JBrowse section and on the right is the Apollo section (Fig. 21). The divider between the two sections can be moved left or right to adjust what is viewable on each side (Fig. 21A). When you open Apollo/JBrowse for the first time, no tracks will be visible. Your browser cache will remember the Apollo/JBrowse settings when you open the Apollo tab again later. To make the tracks visible, click on the "Tracks" tab within the Apollo interface (Fig. 21B), and then expand the track categories and click on "show" by the track names (Fig. 21C). The JBrowse track selection sidebar can also be enabled/disabled by clicking on "JBrowse TrackSelector" in the upper right corner of the Tracks tab in the Apollo section (Fig. 21D).
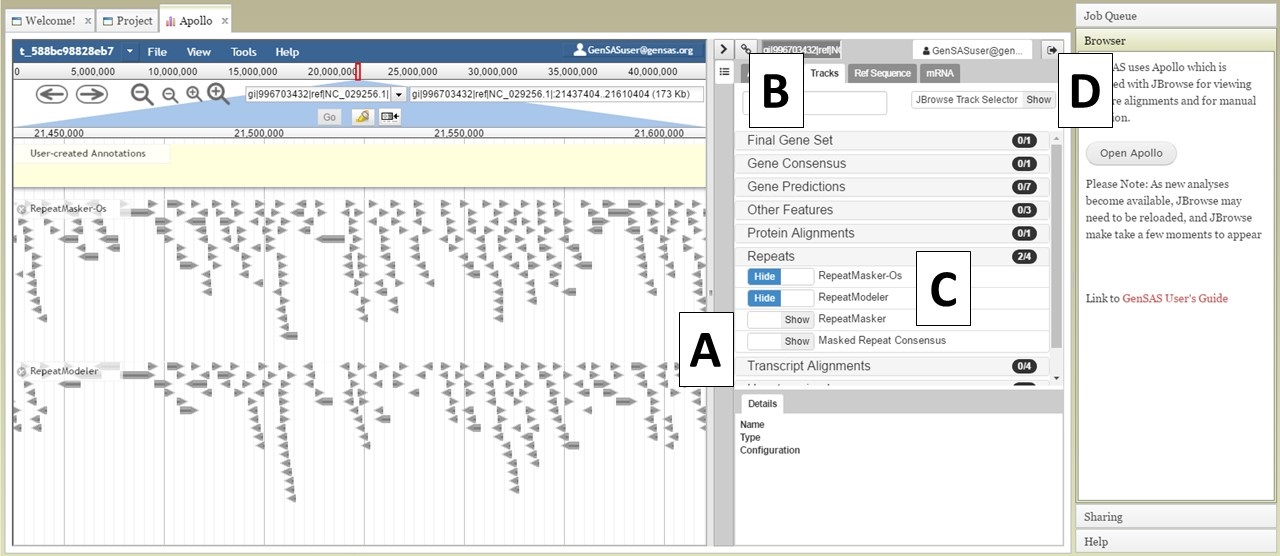
Figure 21. Apollo Tab in GenSAS.
At the top of the JBrowse window, there is a blue toolbar with a graphical represntation of the length of sequence and some contols below that (Fig. 22A). For a project with multiple sequences, only one sequence is displayed at a time. To change to another sequence in the JBrowse window, you can select from the pull down menu (first 30 sequences only) or you can type in the sequence name in the text box (Fig. 22B) and click "Go." You can also change sequences by using the "Ref Sequence" tab in the Apollo window (Fig. 22C).
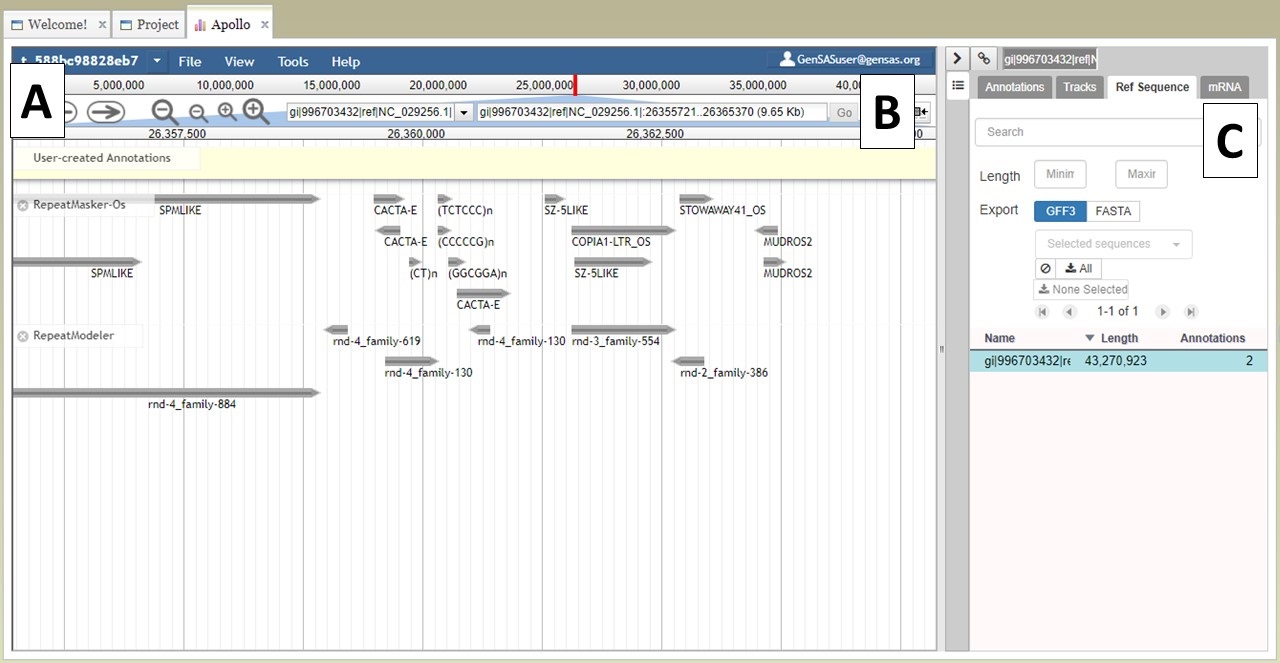
Figure 22. Navigating to different sequences in JBrowse/Apollo.
If you would like to hide the track names in JBrowse, click on the icon that has a box and arrow (Fig. 23A). If you right-click on the track name, track specific options will be available in a menu (Fig. 23B). If you would like to export a region of the track data, that can be done my selecting the "Save track data" option. You can also view details/edit information for a feature on the tracks by selecting and right-clicking on the feature (Fig. 23C).
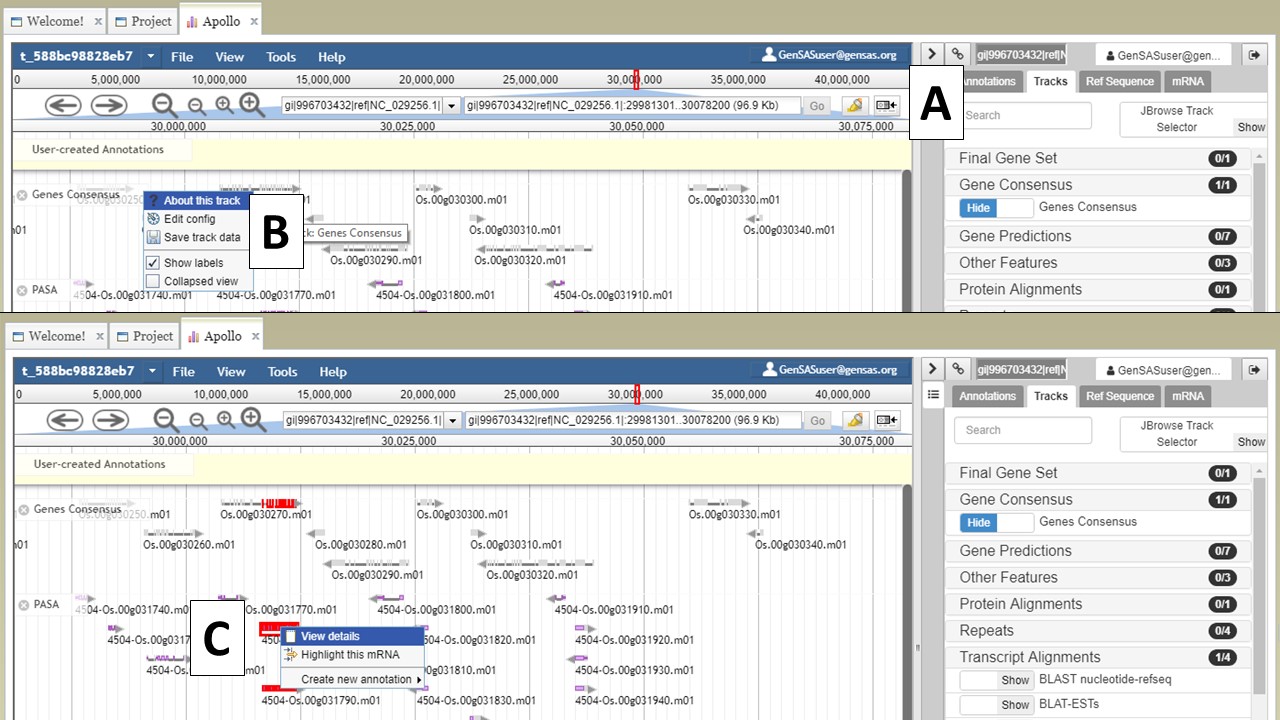
Figure 23. JBrowse functions.
You can also zoom and pan the view in JBrowse. You can use the arrows and magnifying glass icons in the JBrowse header to shift the view left and right and zoom in and out, respectively (Fig. 24A). If you zoom in all the way, you can even see the genome sequence (Fig. 24B). You can also shift the view in the window by clicking and dragging.
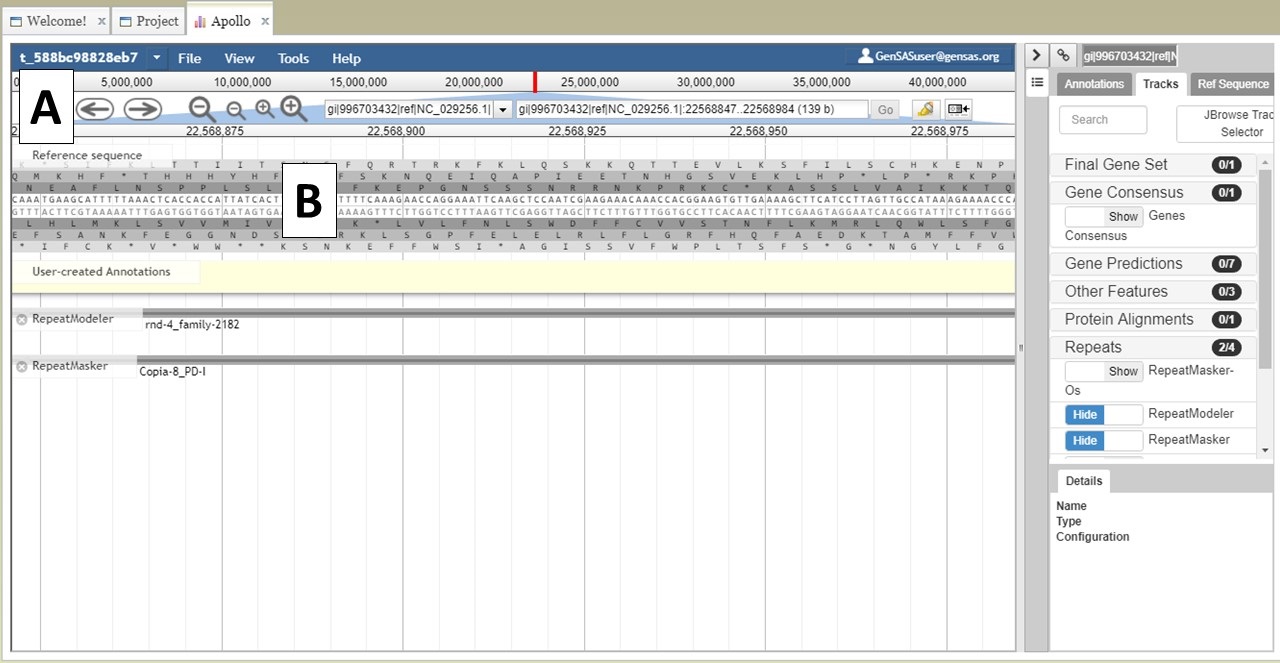
Figure 24. More JBrowse functions.
We will talk more about JBrowse and Apollo functionality in the "Annotate Tab" section of the User Guide. Please use JBrowse to view the results from the annotation tools and make sure the results make sense for your genome before using the data in downstream tools in the pipeline. If a tool does not return good results, it may affect the results of the downstream tool.