
Sequences Tab
The first step to use GenSAS is to add the sequences you would like to annotate. Please note that GenSAS is designed to annotate whole-genome assemblies, not transcript assemblies. Sequence files uploaded to GenSAS must contain less than 25,000 individual sequences and over 50% of those sequences must be over 2,500 bases in length. When you open the GenSAS interface, you will see the welcome tab. The "Sequences" and "Project" tabs on the flowchart in the header will also be available to click. To add sequences, click on "Sequences" in the flowchart in the header. Sequences that are added to GenSAS are associated with your user account and once added, and processed, are available to use in a GenSAS project. All GenSAS tabs have an instructions section (Fig. 5A) that can be viewed or hidden by clicking on "Instructions." The embedded GenSAS instructions contain a basic overview on how to use that part of GenSAS and more detailed instructions are found in this User's Guide.
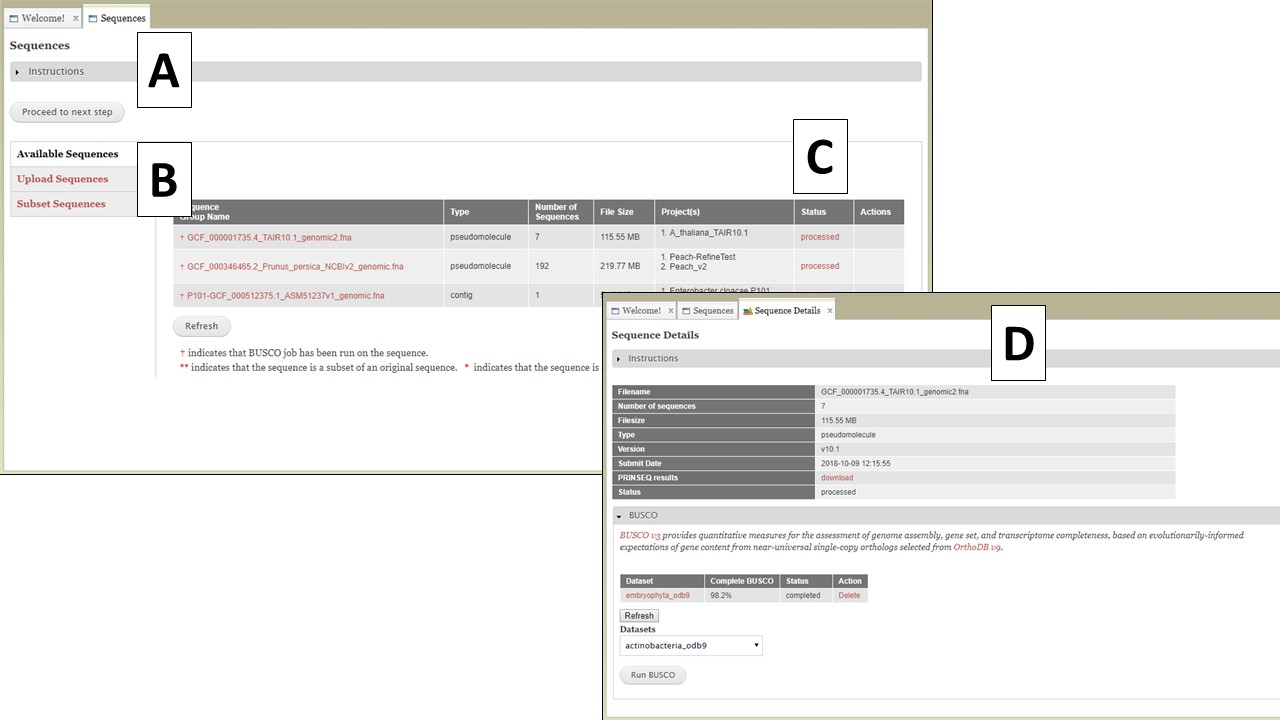
Figure 5. The Sequences tab in GenSAS.
The Sequences tab has three options listed on the right (Fig. 5B); Available Sequences, Upload Sequences, and Subset Sequences. The tab automatically defaults to "Available Sequences" and displays a table of all the sequence groups that are associated with your user account (Fig. 5C). After uploading the file, GenSAS needs time to process the file before it appears on the sequence table, and is available for use in a project. GenSAS checks the file and determines the number of sequences and the size of the sequences. Files that have "violated" the minimum requirements are marked as such under the "Status" column on the table. Clicking on the sequence file name will bring up a summary of the file pre-screening (Fig. 5D). If the sequence file did not pass the screening process, the option to use only the sequences above 2,500 bp in length is available. If the sequence has passed the pre-screening, the option to run BUSCO is available (Fig. 5D). All sequences that are loaded from a multiple-sequence FASTA file are considered to be a single "sequence group." When a sequence group is used in a GenSAS project, all sequences are processed by the annotation tools. The option to remove a sequence group from your user account is only an option if the sequence group is not part of an active GenSAS project. If the sequence can be deleted, the "Delete" button appears in the "Actions" column of the table.
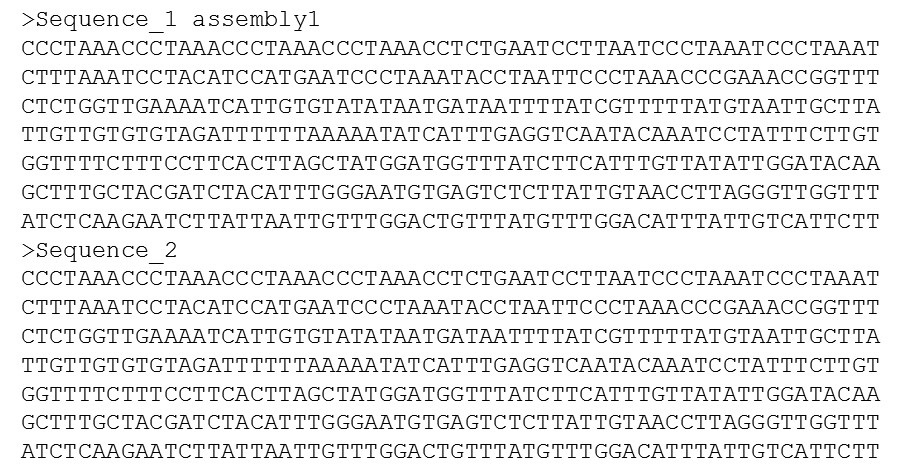
Figure 6. An example of the FASTA file format.
All sequences that are added to GenSAS must be in the FASTA format (Fig. 6). The FASTA format is a very common file format for DNA and protein sequences. The file extension can be one of the following: .fa, .fas, or .fasta. Please do not use spaces in your file names. Replace spaces with underscores or dashes. Within a FASTA file, the sequence name is on a line and starts with a ">". The sequence is then on a new line, immediately after the sequence name and does not have any special characters. A file with multiple sequences should have the next sequence right after the end of the first sequence without an empty line in between them (4 lines total in this example). Please note that any information following the first space in the sequence name will be removed. In Fig. 6, the first sequence is called "Sequence_1 assembly1". In GenSAS, the name will be truncated to "Sequence_1". If the sequence names in this example were missing the underscore in "Sequence_1" and "Sequence_2" and used a space instead, then the sequence names would both be "Sequence" in GenSAS during annotation and at the end when GenSAS produces the final annotation results. Please make sure that your sequences have unique names so the data generated with GenSAS is useful at the end.
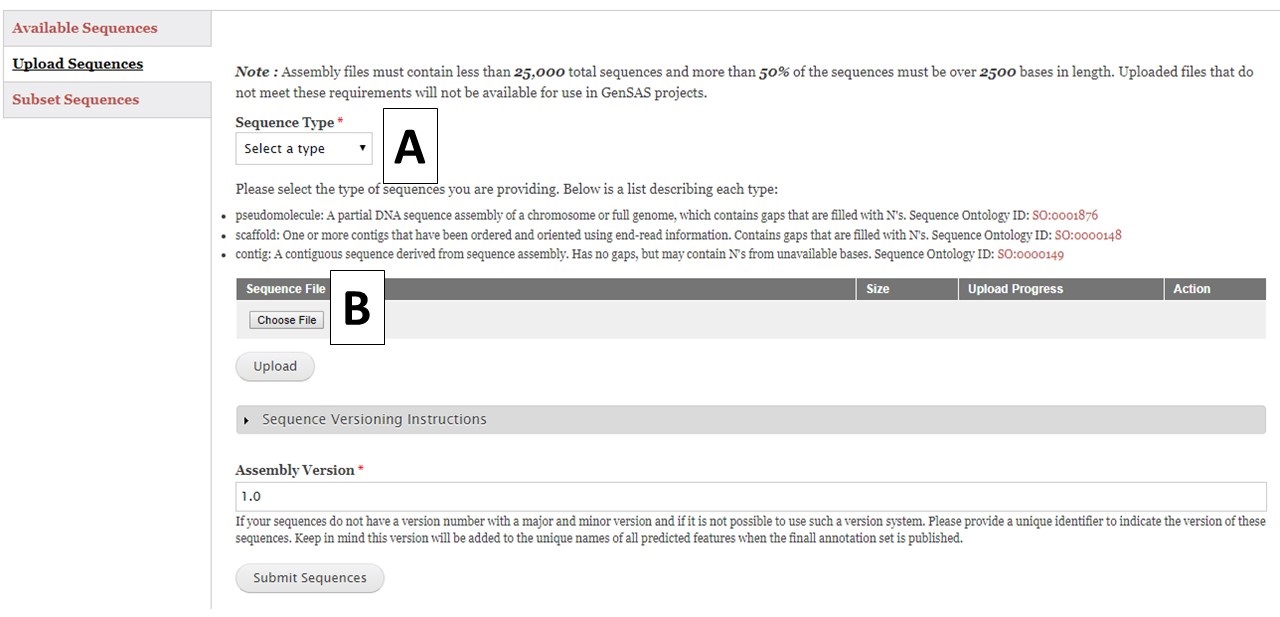
Figure 7. Upload Sequences section of Sequences tab.
To upload sequences, select the sequence type (Fig. 7A) and then choose a single file (Fig. 7B) and click "Upload". While the file is uploading, complete the rest of the webform with the information about the assembly version number. GenSAS will add the assembly and annotation version numbers to the output files during the "Publish" step. Then check on the progress of the file upload. Once the file has successfully uploaded, click the "Submit Sequences" button at the bottom of the page to add your sequences to GenSAS. If you do not click "Submit Sequences," the files will not be added. Please note that after submitting sequences to GenSAS, the file is processed by GenSAS and it make take awhile before the file appears in the "Available Sequences" section (especially true for large sequence files). The Sequence Group will not be available for use in a project until it appears on the table.
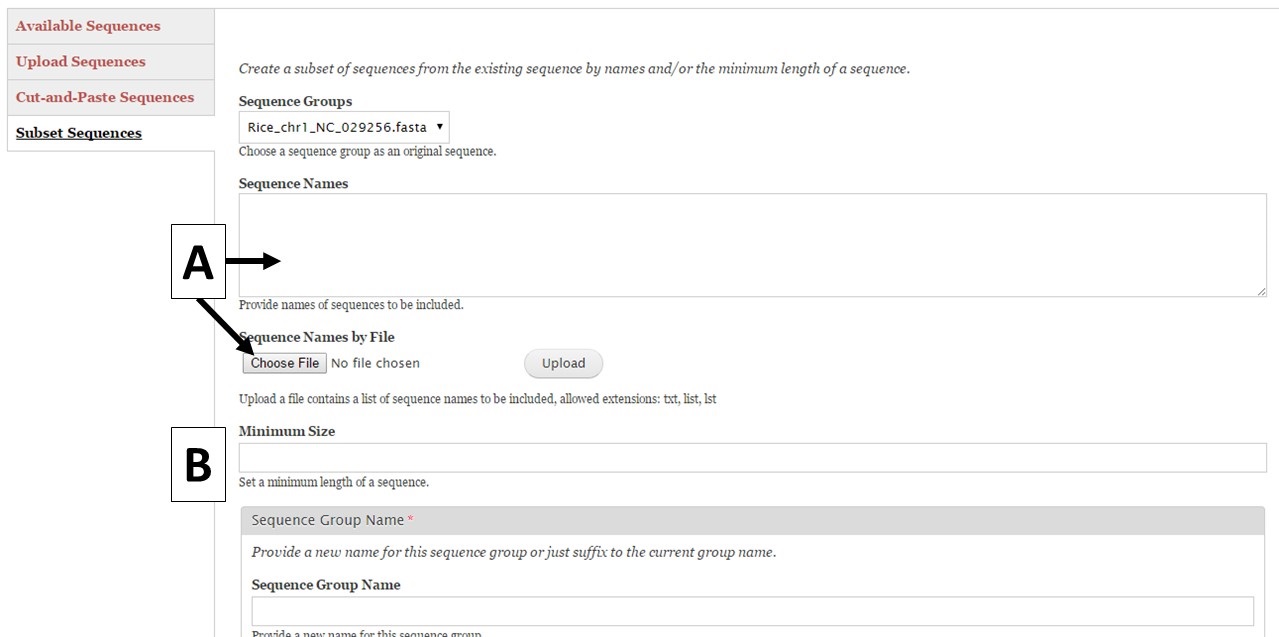
Figure 8. Subset Sequences section of Sequences tab.
GenSAS also has the ability to create sequence subsets from any Sequence Group with multiple sequences. If you are doing a whole genome annotation, or other project with numerous contigs or scaffolds, we highly recommend trying out GenSAS on a smaller subset of sequences so you can optimize the tools settings and can determine which tools work best for your DNA sequences prior to annotating the whole genome. Sequence subsets can be created using the "Subset Sequences" option (Fig. 8). To create a subset, choose the Sequence Group from your previously uploaded sequences using the drop-down menu. You can then filter out sequences by sequence name (Fig. 8A) or minimum size (Fig. 8B). The sequence names can either be entered in the text box, or you can upload a text file of sequence names (one sequence name per line). After setting the filtering options, provide a name for the sequence subset and click "Subset Sequences." Sequence groups created using "Subset Sequences" are shown in the Subset sequences table in the "Available Sequences" section (Fig. 9A). Once the subset appears on this table, the sequence group can be used in a GenSAS project.
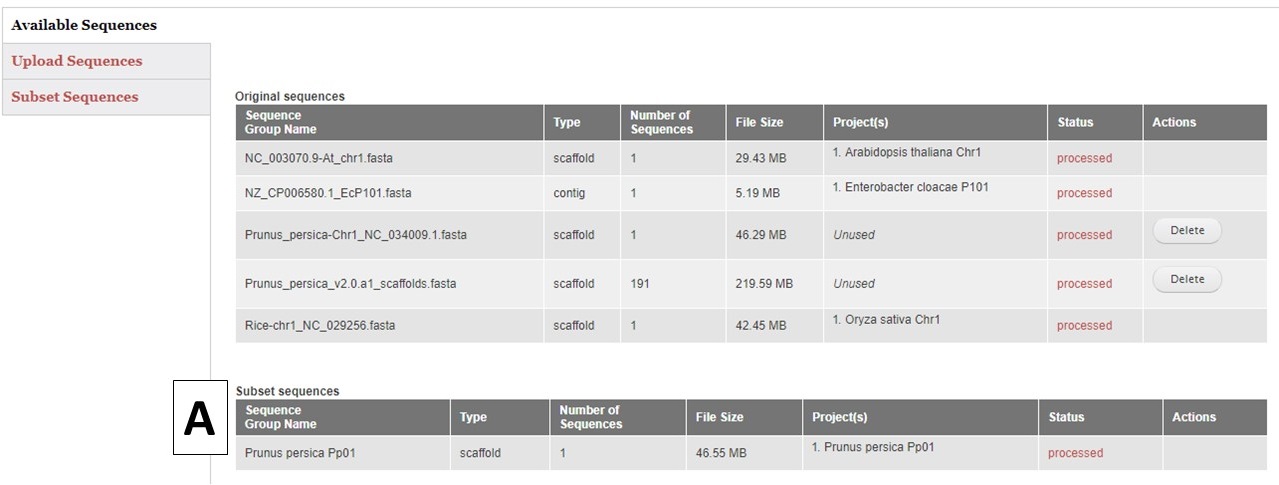
Figure 9. Subset Sequences that are available for use in GenSAS.
If you also have chloroplast, mitochondria, plastid, or plasmid DNA as scaffolds in your eurkaryotic genome project, we recommend separating those sequences out into indiividual projects so they will be annotated with tools more appropriate for those DNA types.