
GenSAS Interface
The GenSAS interface has three main sections. The header region (Fig. 3A) has a flowchart of the annotation process. Annotation steps that are available for use have blue arrows, the step that you are currently viewing has a green arrow, and steps that are not yet available have grey arrows. Clicking on the blue or green colored arrows will open the tab for that step of the annotation process. The header also displays the name of the project that is open in the upper left corner and in the upper right corner is the user name and links to account info, the GenSAS homepage, and to logout.
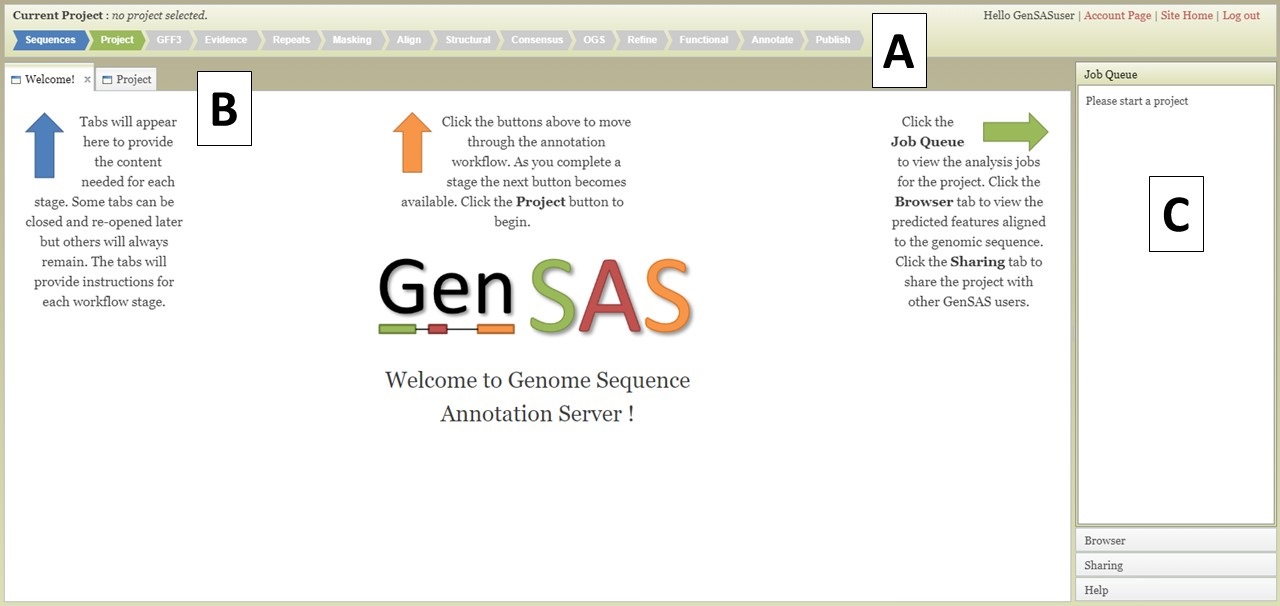
Figure 3. The GenSAS interface.
The center part of the GenSAS interface is the tab area (Fig. 3B). This is the main area where user interaction happens and each step of the annotation process has a tab where jobs can be created. This is the also the area where tabs will open to show job results, to use Apollo, and to view results in JBrowse. More details on the content of the tabs will be covered in the other sections of this guide.
GenSAS has an accordian menu on the right side that has four sections (Fig. 3C). When a project is loaded, the "Job Queue" section will show a list of all jobs that are associated with the project and their status. Once jobs are submitted in GenSAS, you can log out. Jobs will continue to run, and progress will automatically be saved. If you would like to see where your jobs are at in the queue to run on the server, click "View Full Report" at the top of the Job Queue to see more details about each job. Please note that each user may only run seven jobs at one time, across all projects. If more than seven jobs are submitted, the extra jobs will be in "waiting" status until previous jobs finish. If you want to refresh the current run status of jobs, click on "Update status" at top of job queue. The "Browser" section is used to open the Apollo tab (see "Apollo and JBrowse" section for more info). The option to open the browser is only available after the first job associated with the project has completed. The "Sharing" section is for sharing GenSAS projects with another user. Projects can only be shared after there is a completed job for the project (see "Sharing Projects" section for more info). And the last section is the "Help" section. In this section there are links to the User's Guide, troubleshooting, and a link to contact us.
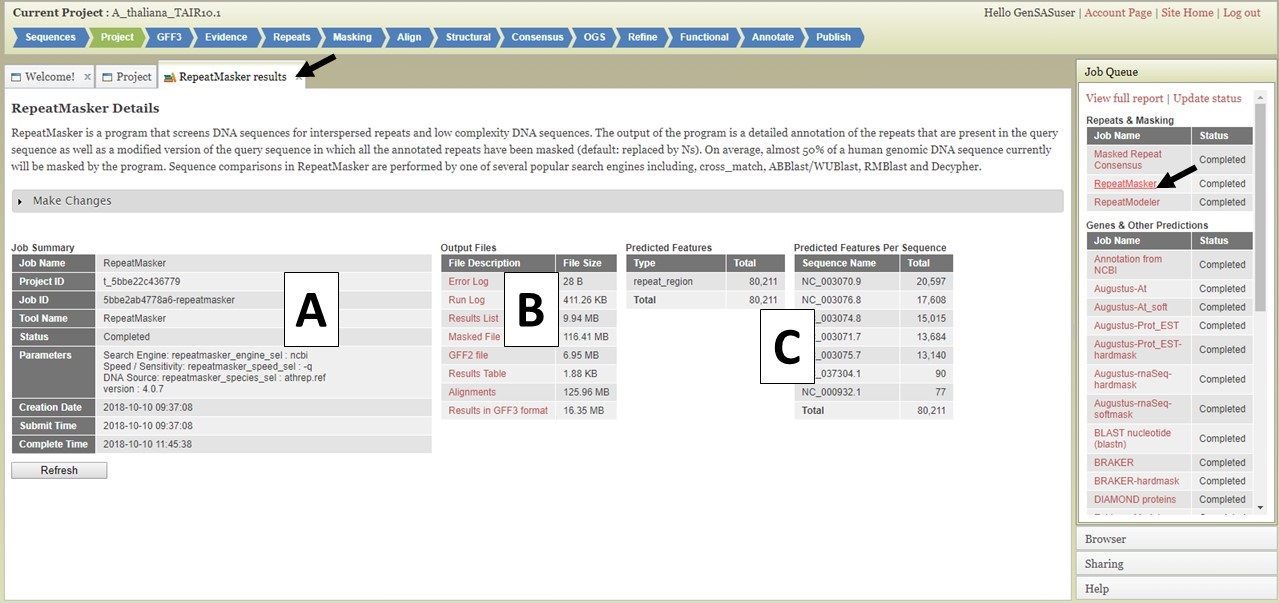
Figure 4. The GenSAS Job Queue.
Clicking on the job name in the Job Queue opens a tab with details about that job (Fig. 4). There is a summary of the job settings in a table on the left (Fig. 4A), and log files and raw result files are in a table in the center (Fig. 4B). The log and raw result files can be downloaded by clicking on the names in the table. On the right, are summary tables listing how many features were annotated by the tool (Fig. 4C). Please do not rely solely on seeing numbers in these tables for the structural annotation tools. Please look at the data in JBrowse to determine if the results make sense before proceeding to the next step. The total number of features from functional annotation tools will not be reported in the Predicted Features tables. For functional annotation results, there will be an additional table with the names of each gene model that returned functional tool results.